widget_driver 1.0.10  widget_driver: ^1.0.10 copied to clipboard
A Flutter presentation layer framework, which will clean up your widget code and make your widgets testable without a need for thousands of mock objects. Let's go driving!

![]()
![]()
WidgetDriver is a Flutter presentation layer framework,
which will clean up your widget code, make your widgets more maintainable and easier to test, and removes the need to mock thousands of dependencies in your widget tests.
Let's go driving! 🚙💨
Features #
In Flutter everything is a Widget. And that is great!
But maybe you should not put all of your code directly in the widgets.
Doing that will:
- give you a headache when you try to write widget tests
- make it tougher to reuse your code
- couple your business logic to your views and make
maintainability and new feature development tough - clutter the declarative UI part of Flutter
WidgetDriver to the rescue!
WidgetDriver gives you a MVVM style presentation layer framework.
It effectively guides you into moving the business logic code out from the widgets and instead have it managed by something called WidgetDrivers.

Your widget stays "pure" and only manages the actual presentation and user input.
The Driver sits between your widget and your business logic (sort of like a ViewModel or an adapter). It is responsible for exposing data to the widget and making any needed adaptions from business model to something which is easily presentable. E.g. if your business logic has a Date object, then the Driver would convert this and expose it as a date string to the widget.
Core features of WidgetDriver #
- Clear separation of concern.
Business logic is managed by theDriverand only the view logic goes in theWidget - Better testability of your
Widgets.
When you useWidgetDriverthen you can test yourWidgetsin isolation!
You do not need to mock hundreds of child dependencies!
Testing benefits #
We have all been there. We write widgetTests and over time we end up with 90% of our testing code being about creating mock objects. Why is that?
Well since widgets tend to contain other child widgets and these widget contains yet more widgets. All these widgets have their own set of dependencies which needs to be resolved when they get created.
So when you want to write a simple widgetTest for a widget, then you end up needing to provide mock data for all the dependencies of all your children. 😱
This is annoying and makes testing tougher and less useful. You only want to focus on testing the current widget. In this moment you do not care which dependencies any of your child widgets might have. (Cause you will anyway test them in isolation later)
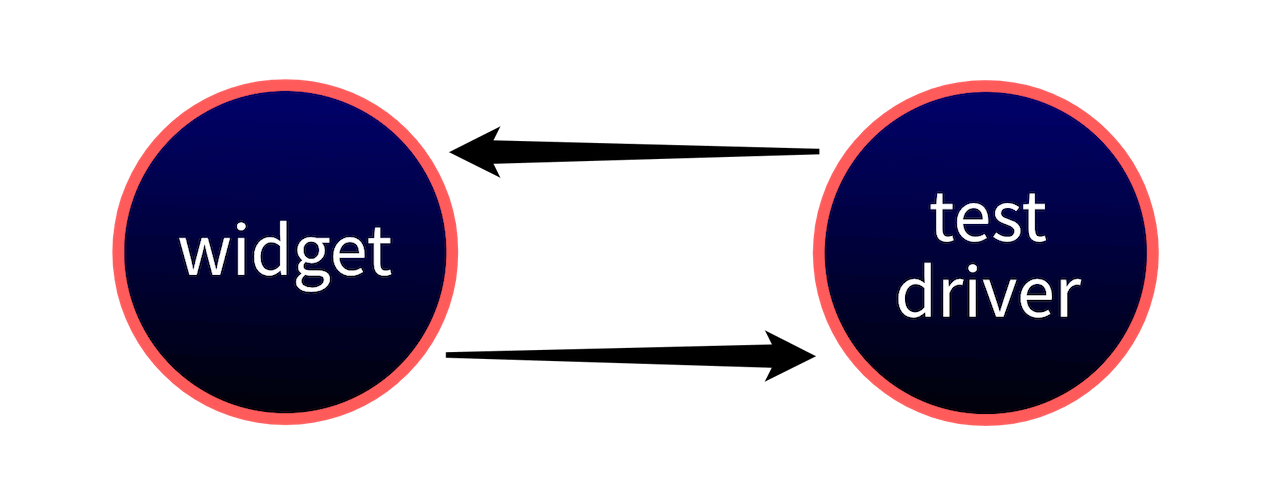
WidgetDriver to the rescue again! WidgetDriver uses a special TestDriver when you are running tests. These TestDrivers provide predefined default values to all child widgets so that you do not need to provide any dependencies! 🥳
This means that during testing, your real Driver is never created. Instead only this TestDriver is created which has only hardcoded values and does not contain any dependencies or business logic.
This mean you can finally test your widgets in isolation!
Just focus on the current widget under test, and forget about all other child widgets and their dependencies!
Installation #
Update your pubspec.yaml with this:
dependencies:
  widget_driver: <latest_version>

...

dev_dependencies:
  build_runner: <latest_version>
  widget_driver_generator: <latest_version>
Usage #
Let's get started and create our first WidgetDriver!
1: counter_widget_driver.dart #
part 'counter_widget_driver.g.dart';

@GenerateTestDriver()
class CounterWidgetDriver extends WidgetDriver {
  final CounterService _counterService;
  late Localization _localization;
  StreamSubscription? _subscription;

  CounterWidgetDriver({
    CounterService? counterService,
  })  : _counterService = counterService ?? GetIt.I.get<CounterService>() {
    _subscription = _counterService.valueStream.listen((_) {
      notifyWidget();
    });
  }

  @override
  void didUpdateBuildContext(BuildContext context) {
    _localization = context.read<Localization>()
  }

  String get counterTitle => _localization.counterTitle;

  int get value => _counterService.value;

  void increment() {
    _counterService.increment();
  }

  void decrement() {
    _counterService.decrement();
  }

  @override
  void dispose() {
    _subscription?.cancel();
    super.dispose();
  }
}
Okay wait, what was all that?! That looks very complicated!
Well, not really. Let's dive into what happens:
-
First we just define a driver which extend the
WidgetDriver.
The "part '...'" definition and the@GenerateTestDriver()annotation above is needed later for the code generation to work.part 'counter_widget_driver.g.dart'; @GenerateTestDriver() class CounterWidgetDriver extends WidgetDriver {And thats all you need to conform to the
WidgetDriverinterface. The rest of the code in aWidgetDriverdepends on your use case. -
Next, we define the dependencies which the driver needs. In our case we need access to some service which can keep track of the count and we need some localizations.
In the constructor of the driver we can load/resolve dependencies using a DI package such as get_it. We can also load/resolve these dependencies from theBuildContext(for example using something like the Provider package). To do that we need to override thedidUpdateBuildContext(BuildContext context)method and there we get access to the BuildContext and can grab data from it.final CounterService _counterService; late Locator _locator; StreamSubscription? _subscription; CounterWidgetDriver({ CounterService? counterService, }) : _counterService = counterService ?? GetIt.I.get<CounterService>() { ... } @override void didUpdateBuildContext(BuildContext context) { _localization = context.read<Localization>() } -
Now we need to add some logic where the
Driverlistens to changes from theCounterServiceand when a change happens, then it will notify the widget that it needs to update. You do this by calling thenotifyWidget()method in the driver. As soon as yourDriverhas new data to display, then you want to call thenotifyWidget()._subscription = _counterService.valueStream.listen((_) { notifyWidget(); }); -
Finally, we define the public API of the driver. Your widget will use these to grab data for its views.
The annotations are used by the
TestDriverto provide default values during testing.For each public property and method you may add the
@TestDriverDefaultValue({default value}). As a parameter to this annotation you provide the default value which will be used in testing when other widgets create this widget.If you have a method or property which returns a future, then you can use the
@TestDriverDefaultFutureValue({default value})instead. It will take the default value and return it as a future.Simple return types like all of Dart's built-in types, enums, Optionals and some frequently used types in widgets like
ColorandIconDataare already covered. More complex types, like your custom classes, must be covered with annotations in your code. You can also optionally add annotations for any of the public fields, properties or methods with return types that are already covered.@TestDriverDefaultValue(CustomClass()) CustomClass get value => _counterService.getCustomClass; String get text => _locale.informativeText; void increment() { _counterService.increment(); } @TestDriverDefaultFutureValue(CustomClass()) Future<CustomClass> giveMeSomeCustomClassSoon() { return _someService.getSomeCustomClassSoon(); }As mentioned, these annotations are used by the
TestDriver, and you have to provide them! The values provided there are only used in testing. Never in any production code. Because in production you use the real business logic.But in your
widgetTeststhese values are used when your widget is used as a child-widget in another widget. This helps you to test widgets in isolation, without caring about which dependencies all your child widgets need. This mean that when you test a widget, you can ignore any dependencies which any of your child widgets might need internally. Since those child widgets will just use the default values provided by theirTestDriver. So you are free to focus on te data which your widget needs.For a more in-depth documentation about
TestDriversread here.
Thats it! Wohoo! 🥳
Now we can continue to the next step!
2: Code generation #
Now it is time to generate some code so that we get our TestDriver and WidgetDriverProvider set up for us.
If you prefer to do this the old fashioned way without code generation, then that is also possible.
Read more about that here
At the root of your flutter project, run this command:
dart run build_runner build --delete-conflicting-outputs
When the build runner completes then we are ready to start building our widget
3: counter_widget.dart #
class CounterWidget extends DrivableWidget<CounterWidgetDriver> {
  @override
  Widget build(BuildContext context) {
    return Column(children: [
      const SizedBox(height: 20),
      Row(
        mainAxisAlignment: MainAxisAlignment.center,
        children: [
          Text(driver.counterTitle),
          const SizedBox(width: 5),
          Text('${driver.value}'),
        ],
      ),
      ElevatedButton(
        onPressed: driver.increment,
        child: const Text('increment'),
      ),
      ElevatedButton(
        onPressed: driver.decrement,
        child: const Text('decrement'),
      ),
    ]);
  }

  @override
  WidgetDriverProvider<CounterWidgetDriver> get driverProvider => $CounterWidgetDriverProvider();
}
And voila, we are done!
Now check out that widget code! Isn't that clean.
Just focused on UI. No nested StreamBuilders or BuildContext being watched.
No business logic in your view code!
And no dependency being created or resolved!
Let's go over what happens:
-
First we name our widget
CounterWidgetand then we need to make itdrivable! We do this by making it extendDrivableWidget. Pass in the name of yourDriveras a generic type to theDrivableWidget.class CounterWidget extends DrivableWidget<CounterWidgetDriver> { -
Now your
IDEwill complain and say that you areMissing concrete implementation ...
To fix this, tap theCreate 2 missing overrides-button and voila! You get some placeholder code which looks like this:@override Widget build(BuildContext context) { ... } @override // TODO: implement driverProvider WidgetDriverProvider<CounterWidgetDriver> get driverProvider => throw UnimplementedError();The build method is nothing new. There you just put your widget creation code!
And thedriverProvideris the thing which knows how to create your driver. Now what do you put here?
No worries, we generated aDriverProviderfor you 🤩 Just replace that line with this:@override WidgetDriverProvider<CounterWidgetDriver> get driverProvider => $CounterWidgetDriverProvider();For each
WidgetDriveryou get a generatedWidgetDriverProvider. They are all prefixed with$to indicate that they are generated. Their name have this pattern:${name-of-your-driver}ProviderSo just grab the provider which belongs to your driver and create an instance of it here.
-
And that is all you need to do!
Now your widget will automatically have access to a property called
driver. This driver is the very sameWidgetDriverwhich we defined earlier. So now you can access all the data from it and assign it to your widgets. For example you can say this:Text(driver.counterTitle),
4: Handling updates to data in WidgetDriver #
But what if my data changes? How do I update the widget? Do I need a builder? Or a context.watch?
NO! The WidgetDriver frameworks handles this for you!
The driver decides when the widget needs to update. So inside your driver code, whenever something important changed and you want to update the widget, then you just call the notifyWidget().
This will automatically make sure that your widget get reloaded and it can consume the latest values from your driver.
If you want to pass data from the widget directly to the driver #
Say we have a ListView which contains multiple coffees. When the user clicks on one of the items, we want to redirect him/her to a details page. So how do we pass that coffee object through our widget to the driver to properly use it.
Easy... 🧙
-
First, we annotate the variable in the driver with the
@driverProvidablePropertyannotation. This tells the generator to allow this variable to be passed through from the widget.@GenerateTestDriver() class CoffeeDetailPageDriver extends WidgetDriver { final int index; final Coffee _coffee; CoffeeDetailPageDriver( @driverProvidableProperty this.index, { @driverProvidableProperty required Coffee coffee, }) : _coffee = coffee; String get coffeeName { return '$index. ${_coffee.name}'; } String get coffeeDescription { return _coffee.description; } String get coffeeImageUrl { return _coffee.imageUrl; } } -
Then we just run the generator like we did before.
-
We should get a compiler warning in the generated file. To resolve that we just have to add the generated abstract class
_$DriverProvidedPropertiesto our driver like this:@GenerateTestDriver() class CoffeeDetailPageDriver extends WidgetDriver implements _$DriverProvidedProperties { ... } -
This requires us to override
didUpdateProvidedProperties(...)which gets called whenever the corresponding widgets gets asked to re-render by its parent (same asdidUpdateWidget). That way we can respond to new values to our provided properties given to us by the widget. (Technical Note: This is because the Driver does not get rebuilt when the widget gets rebuilt. And a call tonotifyWidget()is not necessary, this function gets called before the widget shows the new data.)@GenerateTestDriver() class CoffeeDetailPageDriver extends WidgetDriver implements _$DriverProvidedProperties { int index; Coffee _coffee; CoffeeDetailPageDriver( @driverProvidableProperty this.index, { @driverProvidableProperty required Coffee coffee, }) : _coffee = coffee; ... @override void didUpdateProvidedProperties( int newIndex, Coffee newCoffee, ) { index = newIndex; _coffee = newCoffee; // And whatever else you want to do on state change. } } -
After that we just need to hand the variable over to the
DriverProviderand that's it. 🥳class CoffeeDetailPage extends DrivableWidget<CoffeeDetailPageDriver> { final int index; final Coffee coffee; CoffeeDetailPage({Key? key, required this.index, required this.coffee}) : super(key: key); @override Widget build(BuildContext context) { ... } @override WidgetDriverProvider<CoffeeDetailPageDriver> get driverProvider => $CoffeeDetailPageDriverProvider( index: index, coffee: coffee, ); }
If you want to pass data to the driver via the BuildContext #
You can have your Driver grab dependencies from the BuildContext. To do this you need to override the didUpdateBuildContext(BuildContext context) method in your Driver. In that method you have access to the BuildContext.
This method is called by the framework once right after your driver is created, before your DrivableWidget's build method is called.
In here you typically have 2 options for how to grab data:
-
Either you grab the dependency once by looking up the
BuildContextancestor tree. For example if you are using theProviderpackage, then you would do this with acontext.read<MyDependencyType>() -
Or you grab your dependency as an inherited widget from the
BuildContext. For example if you are using theProviderpackage, then you would do this with acontext.watch<MyDependencyType>().
If you grab the dependency as an inherited widget then when/if your dependency ever changes, the framework will call the didUpdateBuildContext method again on your Driver. There you get access to the BuildContext again and can grab the latest version of your dependency.
Example grabbing a dependency with Provider
If we want to read out a Coffee object from the context, then we can resolve that like this:
class SomeDriver extends WidgetDriver {
  late Coffee _coffee;

  @override
  void didUpdateBuildContext(BuildContext context) {
      _coffee = context.read<Coffee>();
  }
}
The driver would not get an update should the Coffee be changed by a parent widget.
The Provider package however offers us the option to watch the provided value.
class SomeDriver extends WidgetDriver {
  late Coffee _coffee;

  @override
  void didUpdateBuildContext(BuildContext context) {
      _coffee = context.watch<Coffee>();
  }
}
In this case, your driver will always get the latest value for the Coffee if it would ever be changed by a parent widget.
Lifecycle of a Driver #
The Driver lives longer than your Widget. It has the same lifecycle as the State of a StatefulWidget. (If you would look inside the source code you would actually see that the driver is living inside a State object)
If you want to take some action one time the first time the widget gets shown then there is a method in the driver called didInitDriver().
Simple override this method and put your code there.
This method will be called one time for each lifecycle of the Driver.
It will get called after the constructor and after the didUpdatedidUpdateBuildContext and didUpdateProvidedProperties methods have been called. So if you needed to first assign some data in those methods you are safe to use that data in the didInitDriver().
class MyDriver extends WidgetDriver {
  ...
  @override
  void didInitDriver() {
    // Put your one time setup code here.
  }
}
If your WidgetDriver exposes classes that require a lot of overrides #
Some classes have a lot of fields and functions that have to be overridden to construct them.
In this case, adding a proper TestDriverDefaultValue can be burdening. To make it easier, we added
a class called EmptyDefault. By extending this and implementing the
complex class you want the test driver to mock, you can create a empty test class that you can
pass to the Test Driver.
-
Create the testDriver class by extending
EmptyDefaultand implementing the class you want to pass to the Widget Driverclass _TestDriverMyComplexService extends EmptyDefault implements MyComplexService { const _TestDriverReadyToPairConfirmationService(); } -
Construct the newly created class and pass it as
TestDriverDefaultValueclass MyWidgetDriver extends WidgetDriver { ... @TestDriverDefaultValue(_TestDriverMyComplexService()) MyComplexService get value => myComplexService; ... }
Demo #
Here is a demo of how the final product looks like
Guidelines #
WidgetDriver gives you two big benefits.
- Move business logic out of the widget. Clean up the UI code.
- Test widgets in isolation without the need of a huge mocks setup.
But you only gain these benefits if you follow these guidelines.
Guideline One - Architecture 🏗️ #
Move out Business Logic from the Widgets!
That logic should instead go inside other components (services, managers, use cases etc.) and these are then consumed by the Drivers.
It is NOT the job of a Widget to create and combine dependencies!
The Driver is the place where you want to create/resolve dependencies and combine them.
The Driver has access to the BuildContext which was used to create your widget, so you can resolve any needed dependency directly out from that context if you want.
The widget is ONLY interested in creating UI and reacting to interactions from the user.
WidgetDriver gives you all the tools you need to stop putting business logic in the widget.
Guideline Two - Testing 🔬 #
Thanks to the TestDrivers which get auto-created for you when running widget tests, you do not have to mock the dependencies for other widgets. You can focus on the current widget under test.
When you run tests, then the real driver is not created. Instead the testDriver gets created and it just provides hard coded default values.
The only thing you need to do when testing a widget is to mock the driver for that specific widget under test.
You just need to mock the driver used by the widget which is currently under test and that is it! No other mocks for other widgets are needed.
But you only get this benefit if you move the business logic out of the widget.
When you keep business logic in your widgets, then the parent widgets will need to provide mock values for all those child widgets and you end up in mock-mock-mock-world
So please follow guideline one -> Put your business logic in the Driver, not in the Widget!
More about testing and the benefits are described here
Providing dependencies into the build context from a Widget #
If you need to inject some dependencies into the BuildContext then a typical use case is that you create/resolve them in a build method of a widget. And then you use some state management tool like Provider to inject them into the widget tree. Like so:
Widget build(BuildContext context) {
  return Provider(
    create: MyService(someStuffFromContext: context.read<SomeStuff>()),
    child: child,
  );
}
Now this works fine when running the app normally. But when you run widget tests, then any parent of this widget would need to provide a mocked version of SomeStuff into the build context, otherwise the context.read<SomeStuff>() would fail and throw an exception.
To get around this we have created a helper class called DependencyResolver. This class adds a small wrapper around the creation of your dependency and will automatically provide a test default value for you when running tests.
This is how you would use it:
Widget build(BuildContext context) {
  return Provider(
    create: _DependencyResolver(context).get(() => MyService(someStuffFromContext: context.read<SomeStuff>())),
    child: child,
  );
}
Please see the documentation for DependencyResolver for more information.
Examples #
Please see this example app for inspiration on how to use WidgetDrivers in your app.
The app also contains examples on how you can test your DrivableWidgets and their Drivers.
WidgetDriver and State Management #
WidgetDriver is NOT a state management framework/library.
It is a presentation layer framework. It gives structure and organization to the code which drives your widgets.
But the application state should not be stored in the Driver! It is not the owner of state. Think of Drivers as ViewModels. They take in state and transform it and then provide a tailor made version of it to the widget. E.g. the driver might get in a Date object which it then transforms into a string representation and gives this string to the widget.
So the Drivers will need to access state somehow. Here is a list of recommended state management approaches. BUT just make sure to use these state management systems in the Driver.
For e.g. if you choose to use Provider, then don't use your Provider in the widgets. So don't use context.watch<T>() in your widgets build method. Instead you then want to use the Providers in your Driver. See the example app for inspiration on how to do this.
Documentation #
Metadata
Publisher
Metadata
A Flutter presentation layer framework, which will clean up your widget code and make your widgets testable without a need for thousands of mock objects. Let's go driving!
Repository (GitHub)
View/report issues
Contributing
Documentation
License
![]() MIT (LICENSE)
MIT (LICENSE)
Dependencies
flutter, meta, widget_driver_annotation