location_picker_flutter_map 3.0.1  location_picker_flutter_map: ^3.0.1 copied to clipboard
Package that provides Place search and Location picker for flutter maps with alot of cusomizations using Open Street Map
location_picker_flutter_map #
A Flutter package that provides Place search and Location picker for flutter maps with a lot of customizations using Open Street Map.
Features #
- Pick location from map
- Show current location pointer on map
- Search location by places
- Show/Hide controllers, buttons and searchBar
- Use custom map style
- Easy to use
Getting Started #
Setup #
To add the location_picker_flutter_map to your Flutter application read the instructions. Below are some Android and iOS specifics that are required for the package to work correctly.
Android
Upgrade pre 1.12 Android projects
Since version 5.0.0 this plugin is implemented using the Flutter 1.12 Android plugin APIs. Unfortunately this means App developers also need to migrate their Apps to support the new Android infrastructure. You can do so by following the Upgrading pre 1.12 Android projects migration guide. Failing to do so might result in unexpected behaviour.
AndroidX
The location_picker_flutter_map plugin requires the AndroidX version of the Android Support Libraries. This means you need to make sure your Android project supports AndroidX. Detailed instructions can be found here.
The TL;DR version is:
- Add the following to your "gradle.properties" file:
android.useAndroidX=true
android.enableJetifier=true
- Make sure you set the
compileSdkVersionin your "android/app/build.gradle" file:
android {
  compileSdkVersion 33

  ...
}
- Make sure you set the
minSdkVersionin your "android/app/build.gradle" file:
android {
  minSdkVersion 23

  ...
}
- Make sure you replace all the
android.dependencies to their AndroidX counterparts (a full list can be found here: Migrating to AndroidX).
Permissions
On Android you'll need to add either the ACCESS_COARSE_LOCATION or the ACCESS_FINE_LOCATION permission to your Android Manifest. To do so open the AndroidManifest.xml file (located under android/app/src/main) and add one of the following two lines as direct children of the <manifest> tag (when you configure both permissions the ACCESS_FINE_LOCATION will be used by the location_picker_flutter_map plugin):
<uses-permission android:name="android.permission.ACCESS_FINE_LOCATION" />
<uses-permission android:name="android.permission.ACCESS_COARSE_LOCATION" />
NOTE: Specifying the
ACCESS_COARSE_LOCATIONpermission results in location updates with an accuracy approximately equivalent to a city block. It might take a long time (minutes) before you will get your first locations fix asACCESS_COARSE_LOCATIONwill only use the network services to calculate the position of the device. More information can be found here.
iOS
On iOS you'll need to add the following entries to your Info.plist file (located under ios/Runner) in order to access the device's location. Simply open your Info.plist file and add the following (make sure you update the description so it is meaningful in the context of your App):
<key>NSLocationWhenInUseUsageDescription</key>
<string>This app needs access to location when open.</string>
<key>NSLocationAlwaysUsageDescription</key>
<string>This app needs access to location when in the background.</string>
If you would like to receive updates when your App is in the background, you'll also need to add the Background Modes capability to your XCode project (Project > Signing and Capabilities > "+ Capability" button) and select Location Updates. Be careful with this, you will need to explain in detail to Apple why your App needs this when submitting your App to the AppStore. If Apple isn't satisfied with the explanation your App will be rejected.
When using the requestTemporaryFullAccuracy({purposeKey: "YourPurposeKey"}) method, a dictionary should be added to the Info.plist file.
<key>NSLocationTemporaryUsageDescriptionDictionary</key>
<dict>
<key>YourPurposeKey</key>
<string>The example App requires temporary access to the device's precise location.</string>
</dict>
The second key (in this example called YourPurposeKey) should match the purposeKey that is passed in the requestTemporaryFullAccuracy() method. It is possible to define multiple keys for different features in your app. More information can be found in Apple's documentation.
NOTE: the first time requesting temporary full accuracy access it might take several seconds for the pop-up to show. This is due to the fact that iOS is determining the exact user location which may take several seconds. Unfortunately this is out of our hands.
macOS
On macOS you'll need to add the following entries to your Info.plist file (located under macOS/Runner) in order to access the device's location. Simply open your Info.plist file and add the following (make sure you update the description so it is meaningful in the context of your App):
<key>NSLocationUsageDescription</key>
<string>This app needs access to location.</string>
You will also have to add the following entry to the DebugProfile.entitlements and Release.entitlements files. This will declare that your App wants to make use of the device's location services and adds it to the list in the "System Preferences" -> "Security & Privacy" -> "Privacy" settings.
<key>com.apple.security.personal-information.location</key>
<true/>
When using the requestTemporaryFullAccuracy({purposeKey: "YourPurposeKey"}) method, a dictionary should be added to the Info.plist file.
<key>NSLocationTemporaryUsageDescriptionDictionary</key>
<dict>
<key>YourPurposeKey</key>
<string>The example App requires temporary access to the device's precise location.</string>
</dict>
The second key (in this example called YourPurposeKey) should match the purposeKey that is passed in the requestTemporaryFullAccuracy() method. It is possible to define multiple keys for different features in your app. More information can be found in Apple's documentation.
NOTE: the first time requesting temporary full accuracy access it might take several seconds for the pop-up to show. This is due to the fact that macOS is determining the exact user location which may take several seconds. Unfortunately this is out of our hands.
Installing #
Add the following to your pubspec.yaml file:
dependencies:
  location_picker_flutter_map: ^3.0.1
Simple Usage #
Import the following package in your dart file
import 'package:location_picker_flutter_map/location_picker_flutter_map.dart';
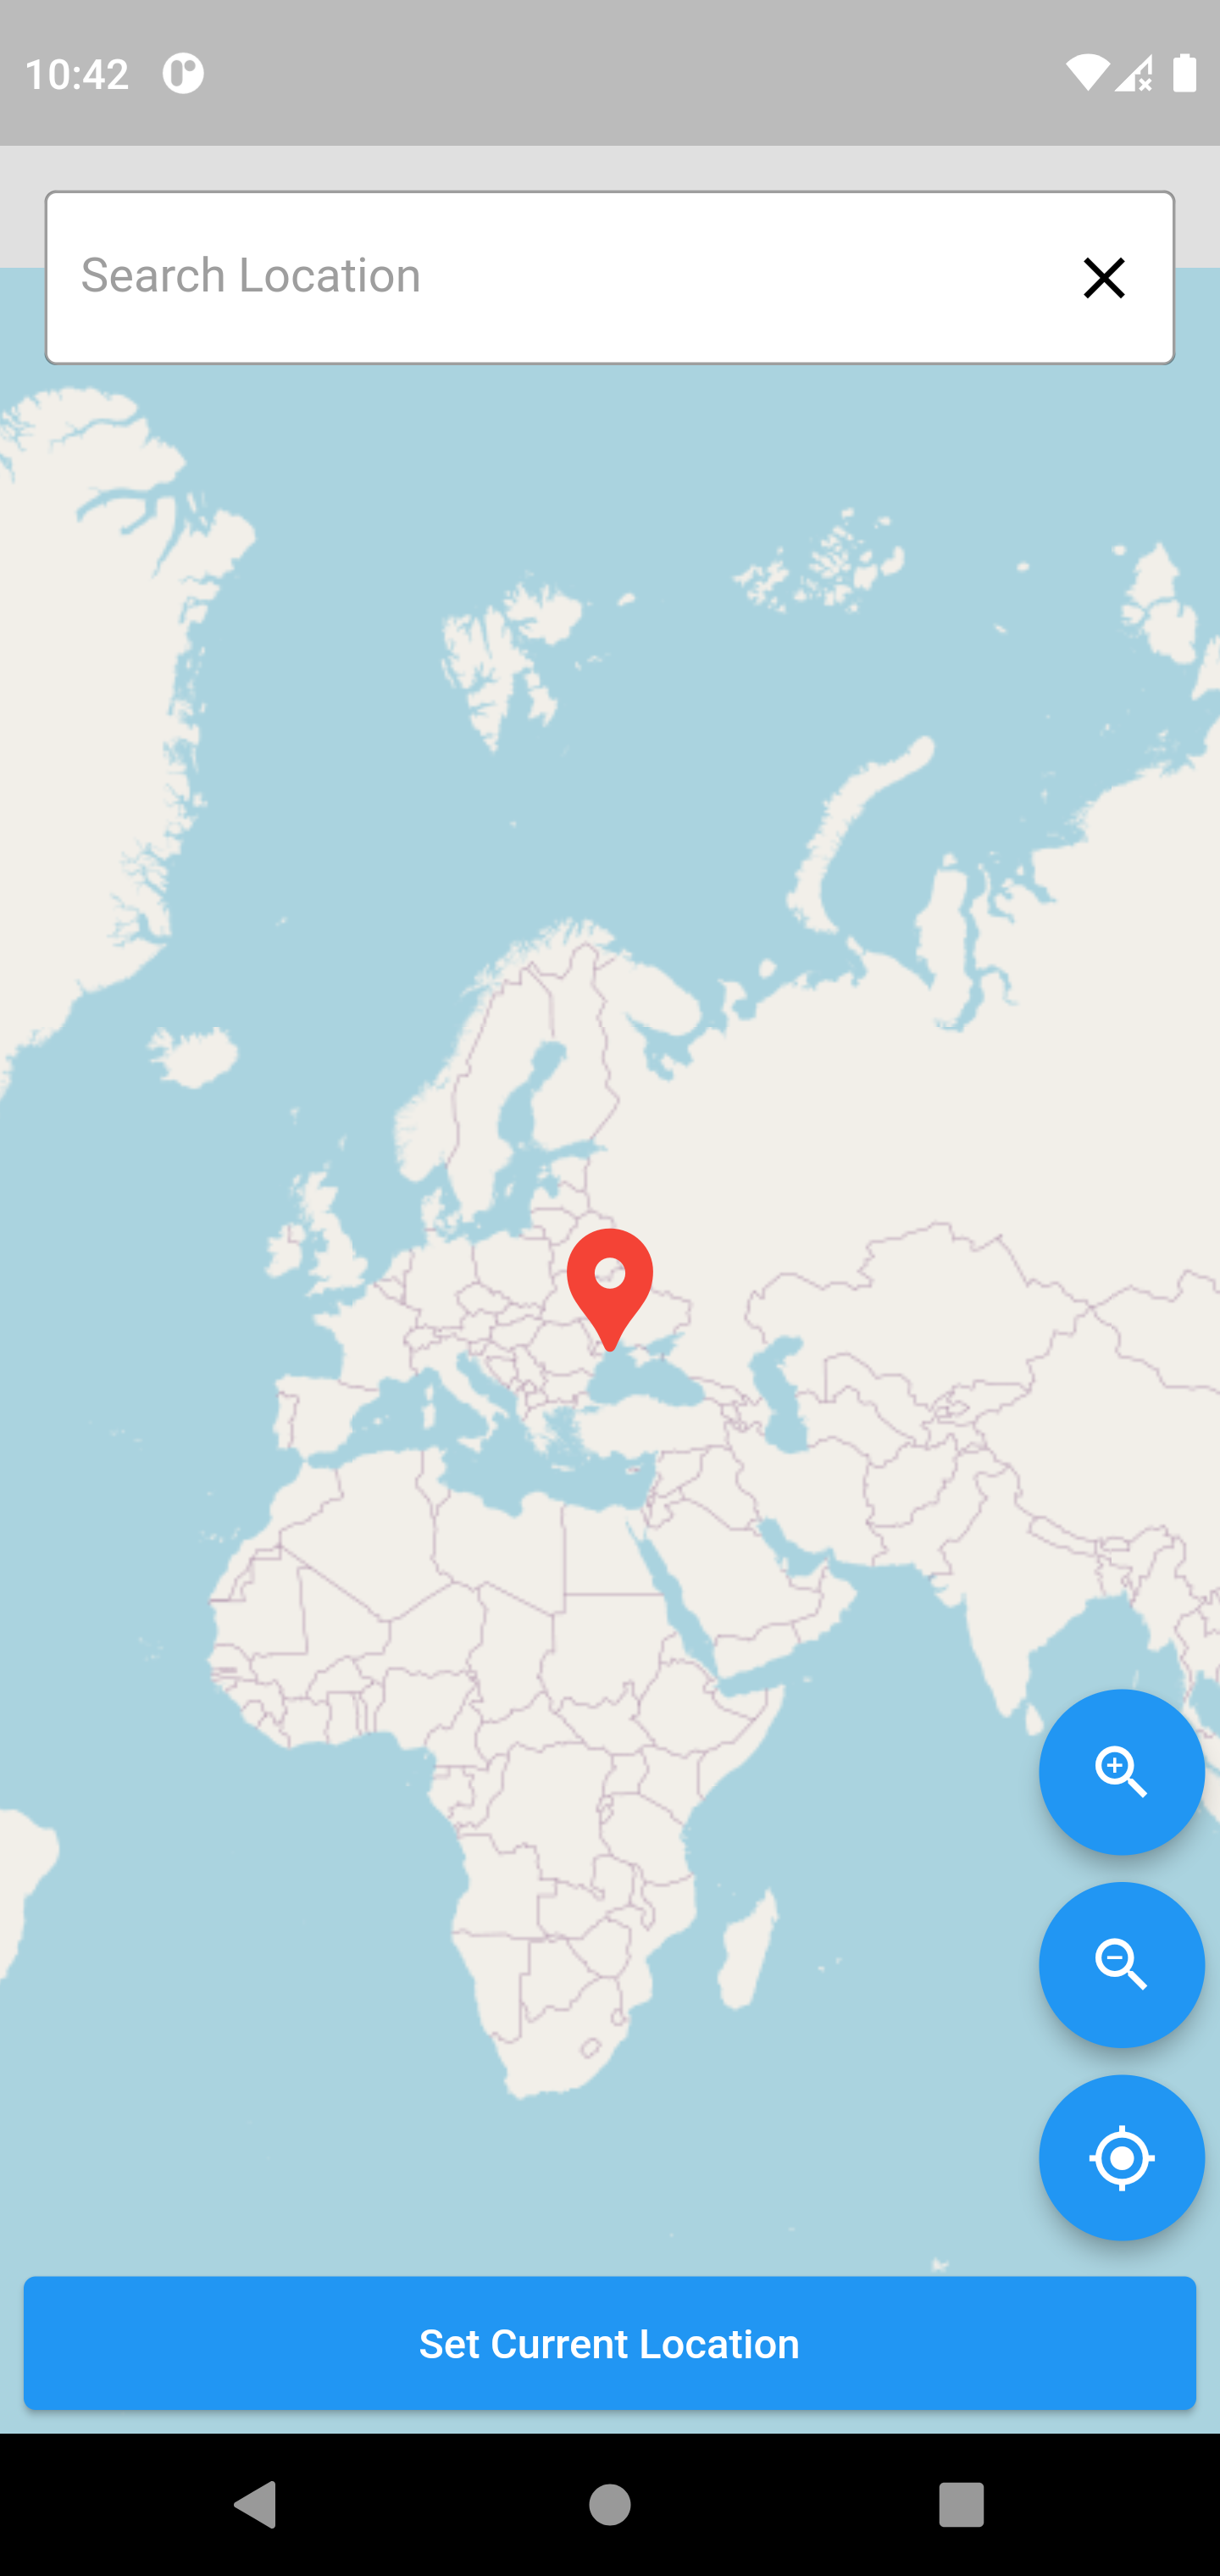
To use is simple, just call the widget bellow. You need to pass the onPicked method to get the picked position from the map.
FlutterLocationPicker(
        initZoom: 11,
        minZoomLevel: 5,
        maxZoomLevel: 16,
        trackMyPosition: true,
        onPicked: (pickedData) {
        })
Then Usage #
Now if you press Set Current Location button, you will get the pinned location by onPicked method.
Or you can use onChanged method to get the picked data whenever user change marker location on map.
The onPicked and onChanged methods return pickedData.
pickedData has three properties.
- latLong
- address
//String address - addressData
//Map<String, dynamic> contains address details
latLong has two more properties.
- latitude
- longitude
For example
FlutterLocationPicker(
        initPosition: LatLong(23, 89),
        selectLocationButtonStyle: ButtonStyle(
          backgroundColor: MaterialStateProperty.all(Colors.blue),
        ),
        selectedLocationButtonTextstyle: const TextStyle(fontSize: 18),
        selectLocationButtonText: 'Set Current Location',
        selectLocationButtonLeadingIcon: const Icon(Icons.check),
        initZoom: 11,
        minZoomLevel: 5,
        maxZoomLevel: 16,
        trackMyPosition: true,
        onError: (e) => print(e),
        onPicked: (pickedData) {
          print(pickedData.latLong.latitude);
          print(pickedData.latLong.longitude);
          print(pickedData.address);
          print(pickedData.addressData['country']);
        },
        onChanged: (pickedData) {
          print(pickedData.latLong.latitude);
          print(pickedData.latLong.longitude);
          print(pickedData.address);
          print(pickedData.addressData);
        })
You can get latitude, longitude, address and addressData like that.
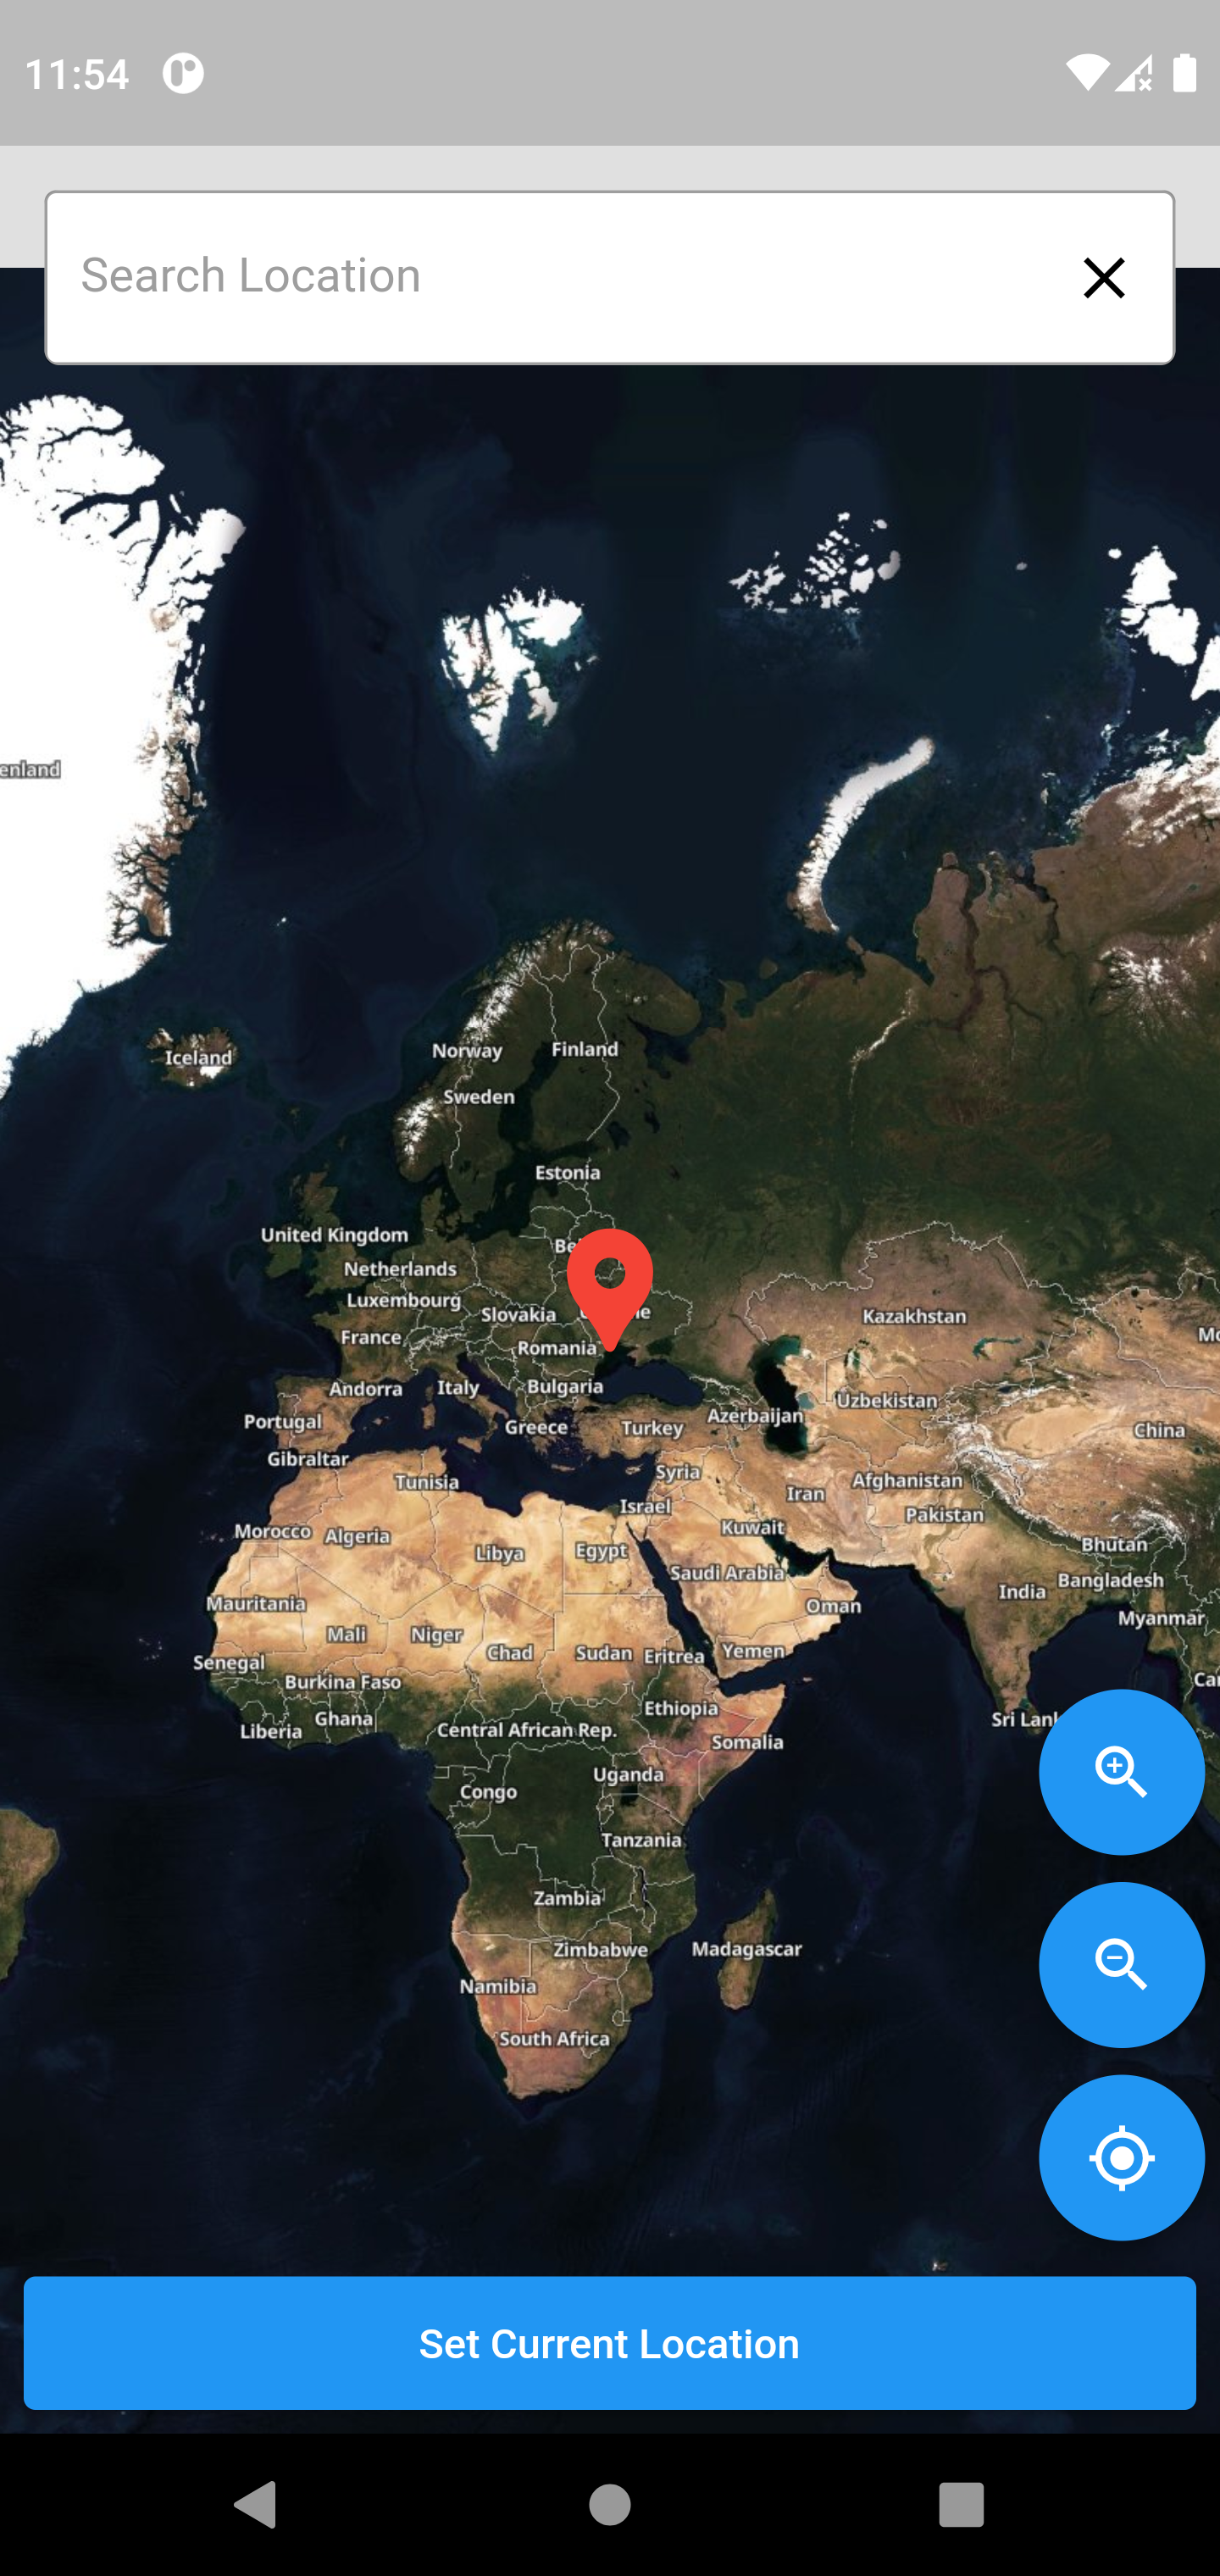
Custom Map Style #
You can apply themes to your map using Map Tiler
Head to the website and sign up then choose the map tile you want
Get the Maptile Url like this
https://api.maptiler.com/maps/hybrid/{z}/{x}/{y}.jpg?{apikey}
use it in the urlTemplate parameter.
FlutterLocationPicker(
    urlTemplate:
        'https://api.maptiler.com/maps/hybrid/{z}/{x}/{y}.jpg?key={apikey}',
    )
Example:
Contributing #
Pull requests are welcome. For major changes, please open an issue first to discuss what you would like to change.
Please make sure to update tests as appropriate.
Author #
👤 Michael Maher
- Twitter: @Michael___Maher
- Github: @Michael-M-aher
Show your support #
Please ⭐️ this repository if this project helped you!

📝 License #
Copyright © 2022 Michael Maher.
This project is MIT licensed.
Metadata
Publisher
unverified uploader
Metadata
Package that provides Place search and Location picker for flutter maps with alot of cusomizations using Open Street Map
Repository (GitHub)
View/report issues
Documentation
License
![]() MIT (LICENSE)
MIT (LICENSE)
Dependencies
flutter, flutter_map, flutter_map_cancellable_tile_provider, flutter_map_location_marker, geolocator, http, intl, latlong2, url_launcher